Step 1: Add IMAP to Mail (Mac)
1. Open the Mail app on your iMac or Apple computer.
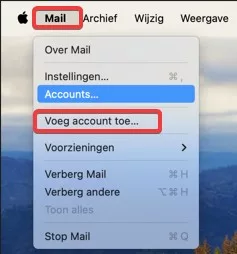
2. Click **'Mail' at the top left of the menu bar.
3. Select 'Add account...' from the drop-down menu.
Follow the next steps to enter your IMAP settings and further configure your account.
Step 2: Select 'Other Mail account'
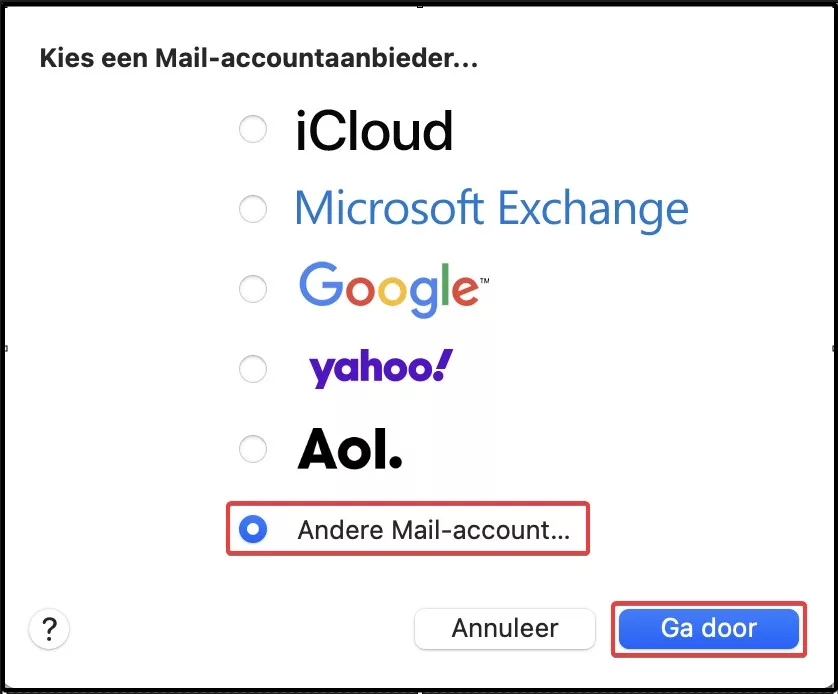
4. In the window that appears, choose 'Other Mail account...' from the list of options.
5. Click 'Continue' to proceed to the screen where you can enter your account details.
You are now ready to enter your e-mail account details.
Step 3: Entering data
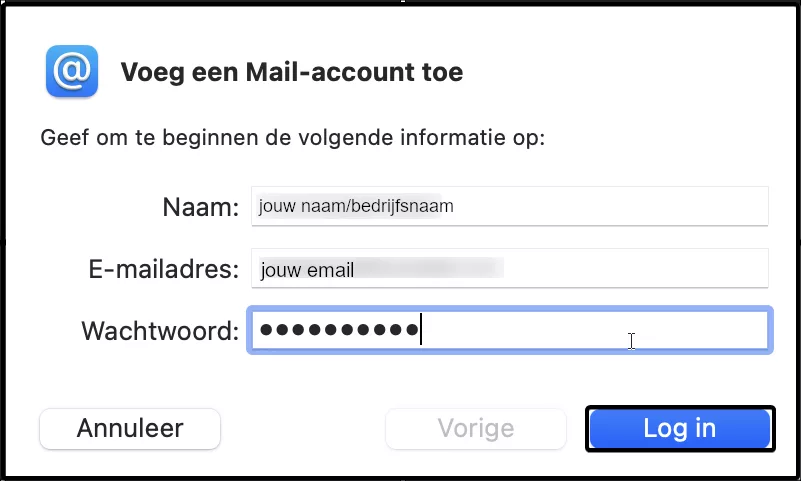
6. Fill in the requested details:
- Name: Choose a name for the account (this is how the account is displayed in Mail).
- Email address: Enter your full e-mail address.
- Password: Enter the password belonging to your e-mail address.
7. Click 'Log in' to continue.
Mail will now try to verify your account information.
Step 4: Manual entry of server settings
Step 4: Manual entry of server settings
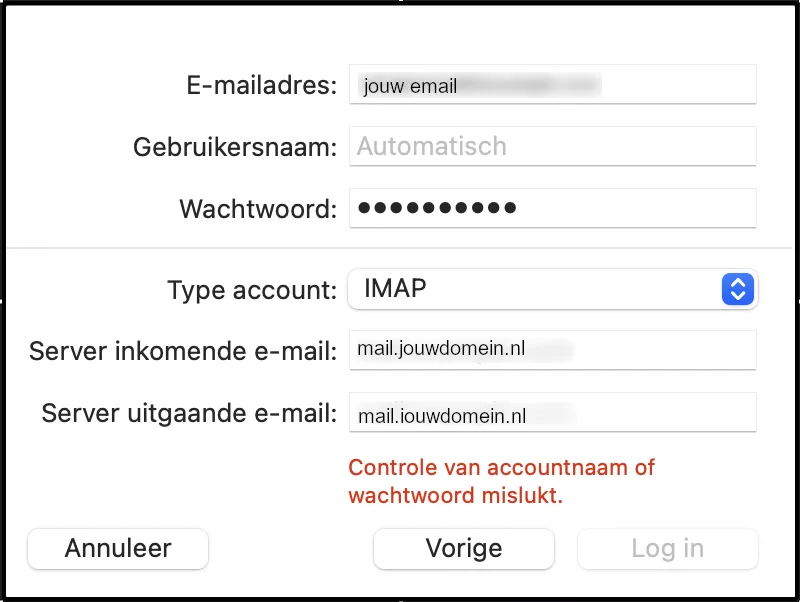
8. If the programme indicates 'Verification of account name or password failed', a screen appears where you can enter additional details.
9. Fill in the following details:
- Account type: Select IMAP.
- Server for incoming mail: Enter the incoming mail server, for example mail.yourdomain.com. Replace this with your own domain or, if applicable, with the Plesk server address of an external website.
- Server for outgoing mail: Enter the outgoing mail server, for example mail.yourdomain.com. Replace this with your own domain or the Plesk server address of an external website.
10. Click 'Log in' to continue the configuration.
Mail will try to verify account settings.
Step 5: Select the apps you want
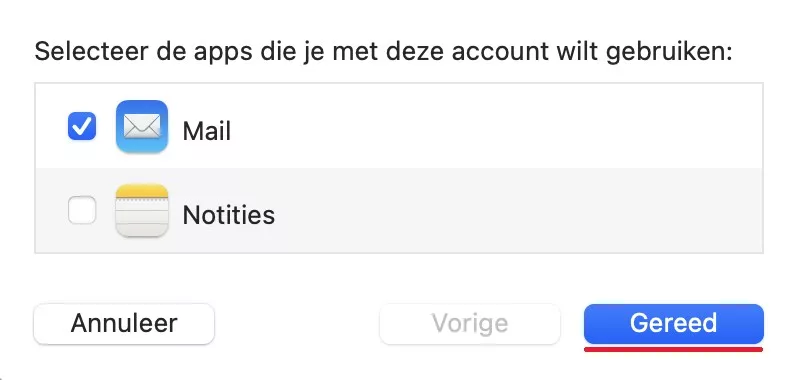
11. Select the apps you want to use with your email account. Make sure 'Mail' is checked to be able to receive and send your emails via the Mail app.
12. Click 'Done' to complete the configuration.
Step 6: Confirming the configuration
13. After this, your mail account has been added and you can immediately use it to send and receive e-mails.
-
Your email account is now successfully set up on your Mac.