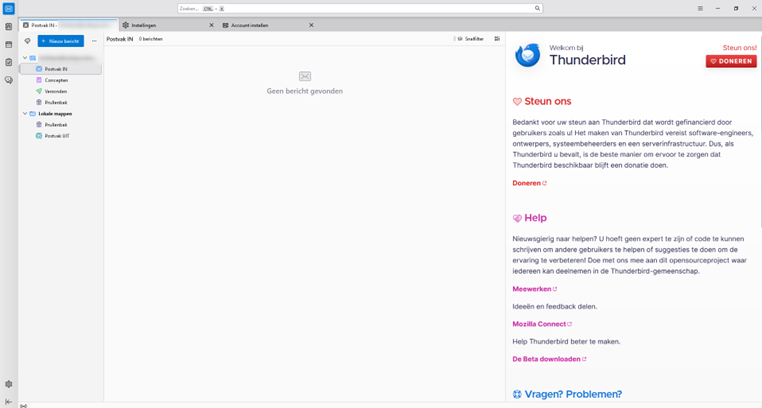
Thunderbird is a free, open-source e-mail client that is secure, reliable and easy to use. It offers powerful features such as built-in spam filters, an extensive search function and support for multiple e-mail accounts. In addition, Thunderbird protects your privacy through encryption and other security options.
Available platforms:
Thunderbird is available for Windows, macOS and Linux, making it accessible to almost any type of user, regardless of the platform you use.

Step 1
Open Thunderbird and go to settings
- Launch Thunderbird: Open the Thunderbird programme on your computer.
- Access to settings: Click on the settings icon (gear icon), which is located at the bottom left of the screen.
Haven't you installed Thunderbird yet? You can download the programme from the official website: thunderbird.net
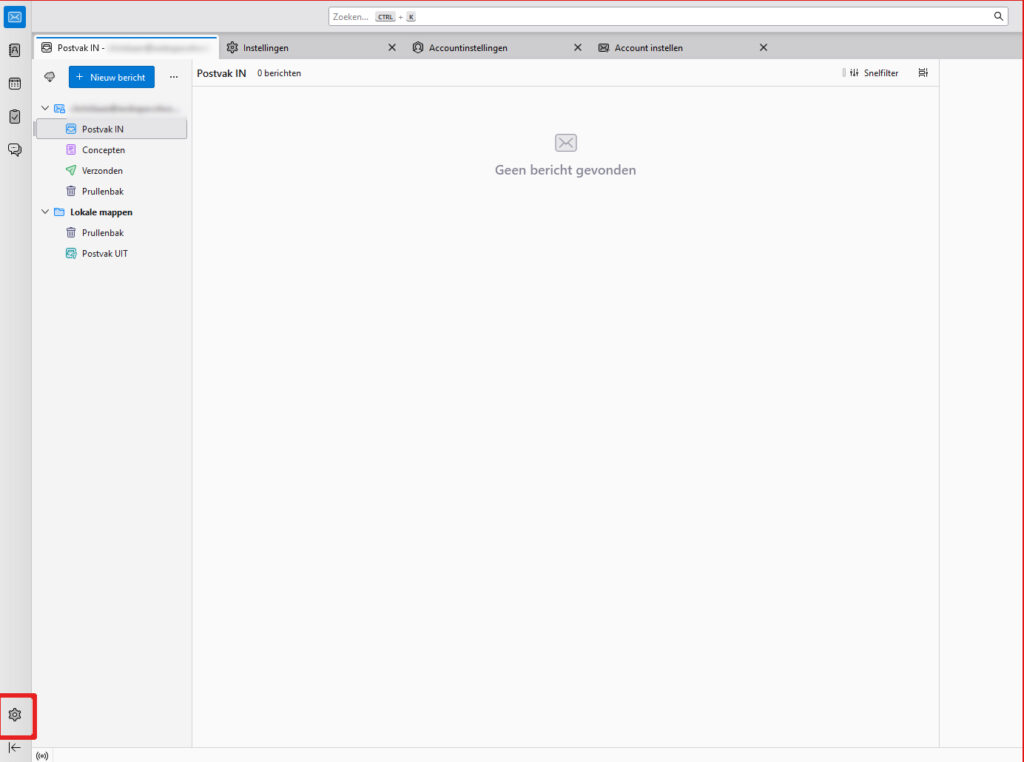
Step 2 - Account settings
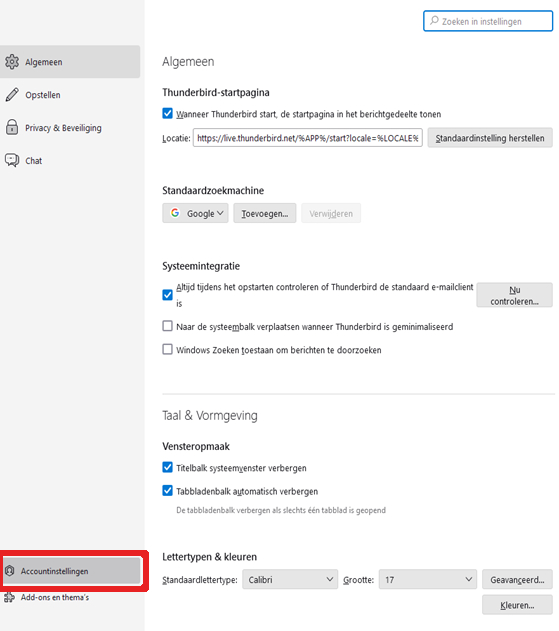
Click on Account settings:
Find the Account Settings option in the menu at the bottom left of the screen and click on it.
Step 3 - Add an e-mail account
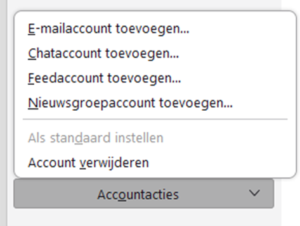
Click on Add e-mail account
- Click on Account actions: In the Account settings-menu, click on the option Account actions.
- Add email account: Then choose Add e-mail account from the drop-down menu.
Step 4 - set up e-mail address
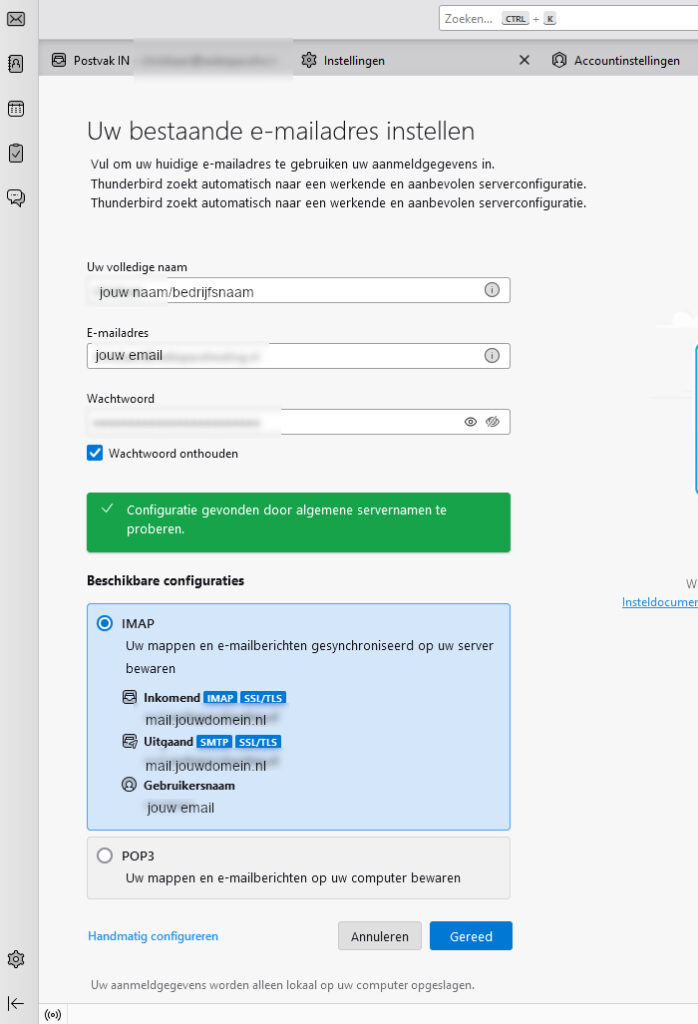
Enter your full name, e-mail address and password
- Full name: This is the name visible when you send emails from Thunderbird.
- E-mail address: This is the e-mail address you created earlier in Control Panel. For example, use:
mail.yourdomain.com, whereyourdomain.co.ukbecomes your business domain. - Password: This is the same password you use to log in to Webmail.
Tick the 'Remember password' box (optional)
- If you want Thunderbird to remember your password so you don't have to enter it every time, you can tick this box.
Click on 'Continue
- Thunderbird will now try to automatically detect the e-mail settings and configure your account.
Step 5 - Verification
Check the settings
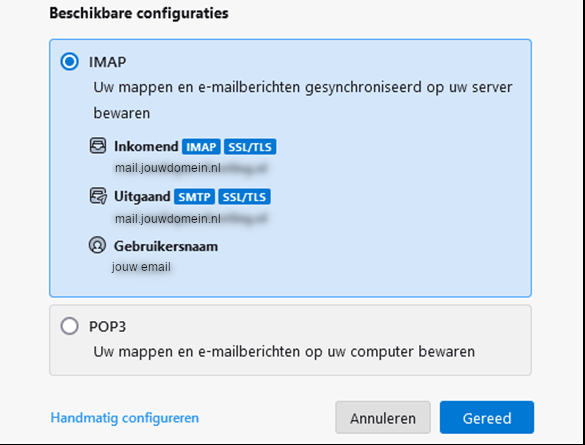
Thunderbird will try to detect the correct e-mail settings automatically.
If everything looks good:
- Click on Done to complete the configuration. You can now start sending and receiving emails via Thunderbird.
If Thunderbird does not automatically detect the settings:
- Click on Configure manually to adjust the settings yourself. Then continue with Step 6.
Step 6 - Manual
Configure manually
If the automatic installation failed, you can enter the settings manually. Follow these steps:
Click on 'Manually configure'
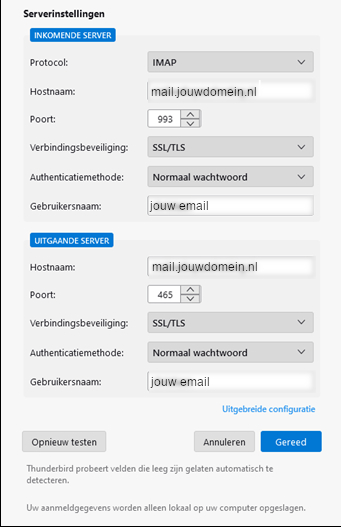
This will open a window where you can enter the e-mail settings.Enter the correct settings for the incoming and outgoing server:
Incoming server (IMAP):
- Protocol: IMAP
- Host name:
mail.yourdomain.com - Port: 993
- Connection protection: SSL/TLS
- Verification method: Password
- Username: The e-mail address you wish to add
Outgoing server (SMTP):
- Host name:
mail.yourdomain.com - Port: 465
- Connection protection: SSL/TLS
- Verification method: Password
- Username: Same e-mail address as for the incoming server
Click on 'Done
After adding the appropriate settings, click on Done to complete the installation.
Step 7 - Click on 'Done'
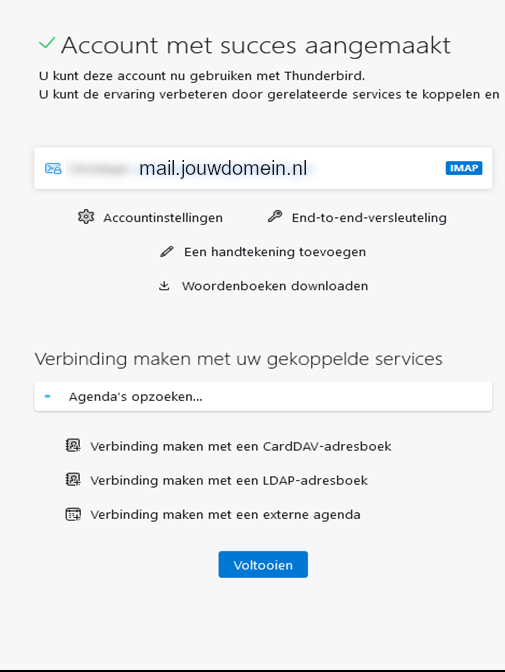
Click on Done to complete the installation. Your email account is now fully set up and ready to use in Thunderbird!
Step 8 - Done!
You have now successfully added your email account to Thunderbird! You can now send and receive emails.
