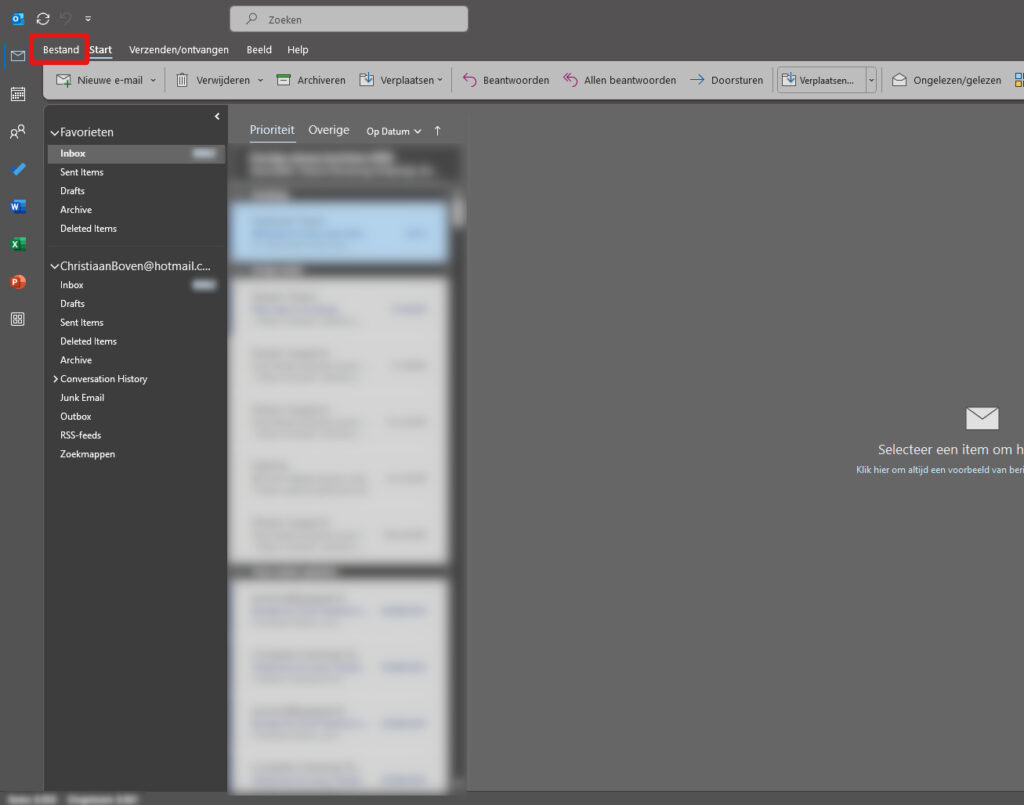
Step 1: Open Outlook and click on File
Launch Outlook by opening the programme on your computer.
Once Outlook is open, go to the top-left corner of the window.
Click File to open the options menu.
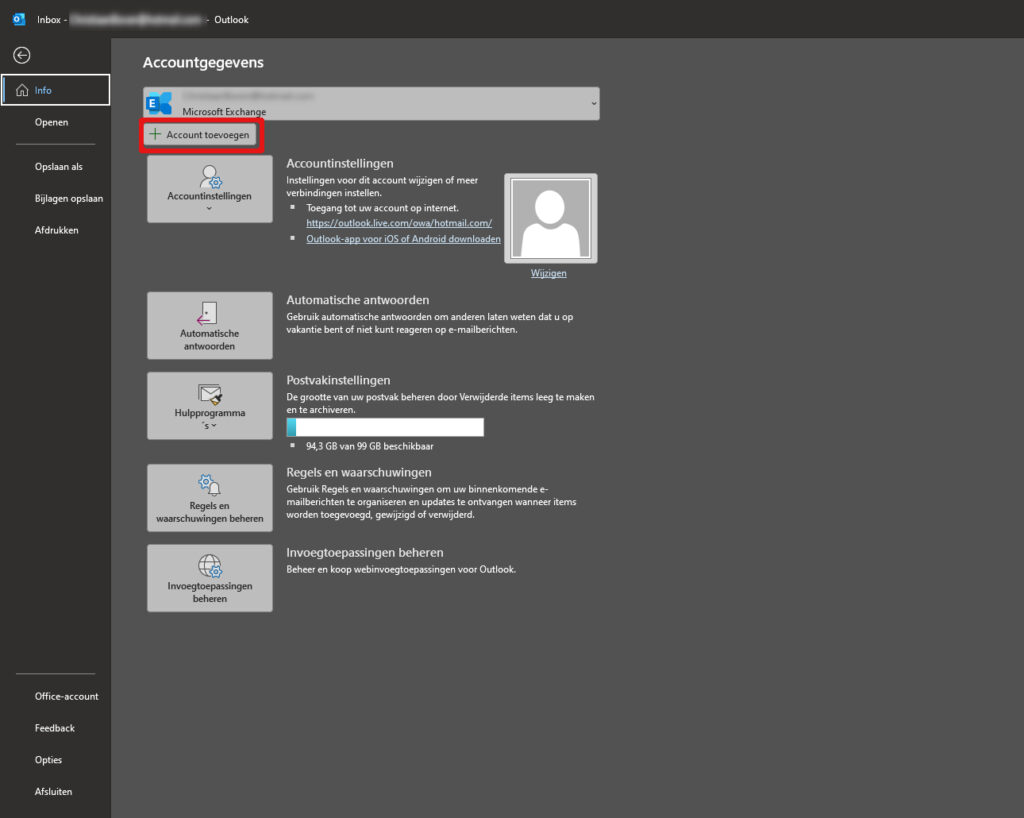
Step 2: Click on Add account
In the File menu, select the Add account option.
This will open a window where you can configure a new e-mail account.
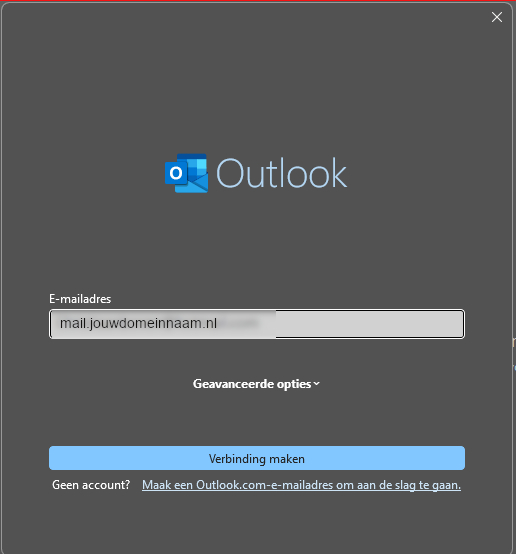
Step 3: enter the e-mail address
In the Add Account window, enter the e-mail address you want to add.
Then click Connect to continue with the configuration.
Step 4: Password
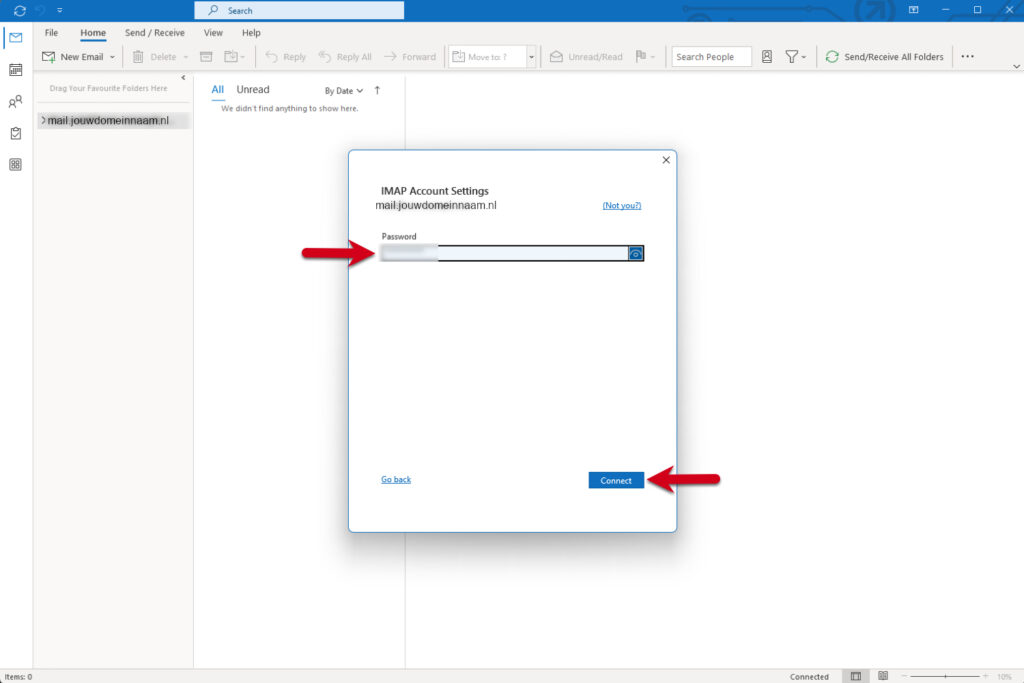
After you click Connect, a field appears where you have to enter the password.
Enter the password you use to log in to Webmail.
Click Connect to continue.
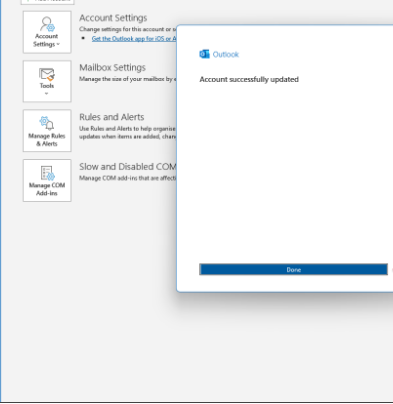
Step 5: Close the automatic installation
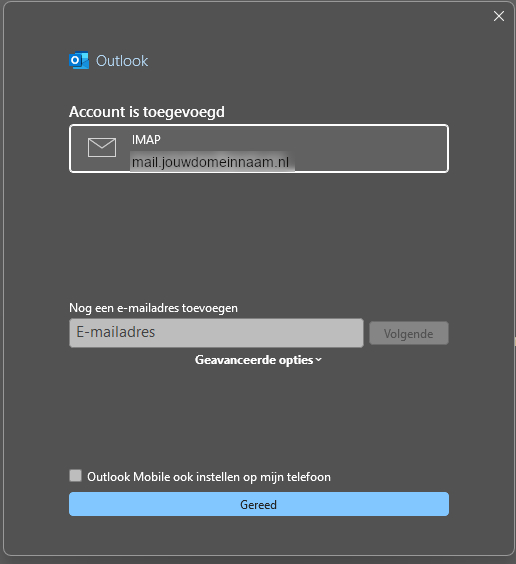
After the installation is complete, you will get a confirmation message.
Click Done to complete the installation and close Outlook.
Step 6: Go to File again
Your email account is now set up. Follow these steps to continue:
Click on 'File' in the menu bar at the top of your screen.

Step 7: Check account name and sync settings
Open File:
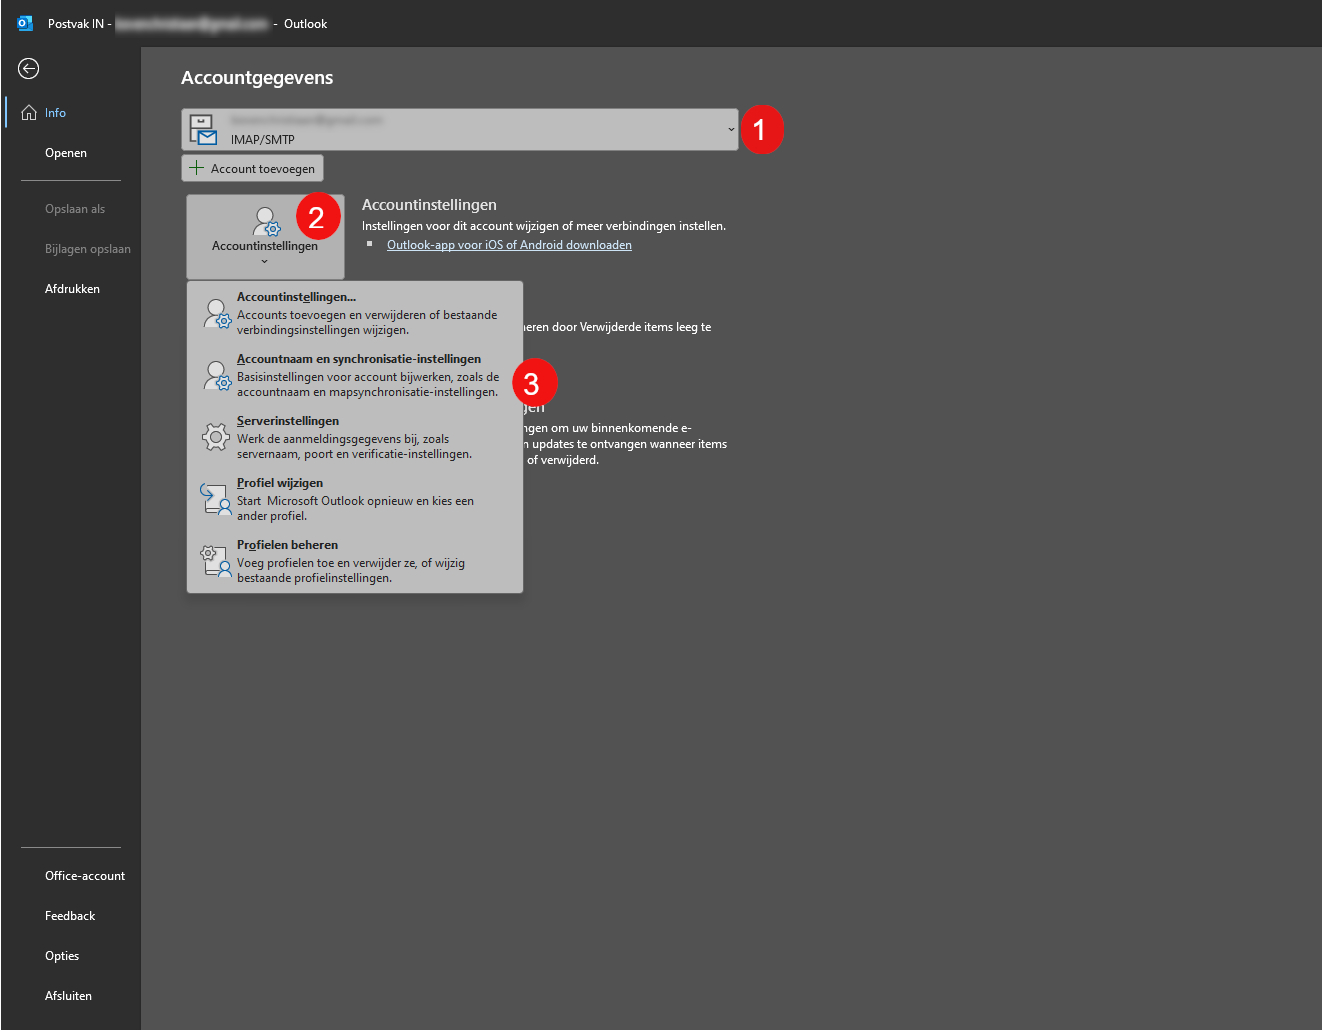
1.Select your E-mail account:
At the top of the screen, you will find a dropdown menu. Click this menu and choose the e-mail account for which you want to check the settings.
2.Accessing Account Settings:
Click on the 'Account settings' option. This will open a new window or menu with various account options.
3.In the menu that appears, choose 'Account name and Sync settings'. This will take you to the page where you can view and adjust these specific settings
Step 8: Setting the root folder path
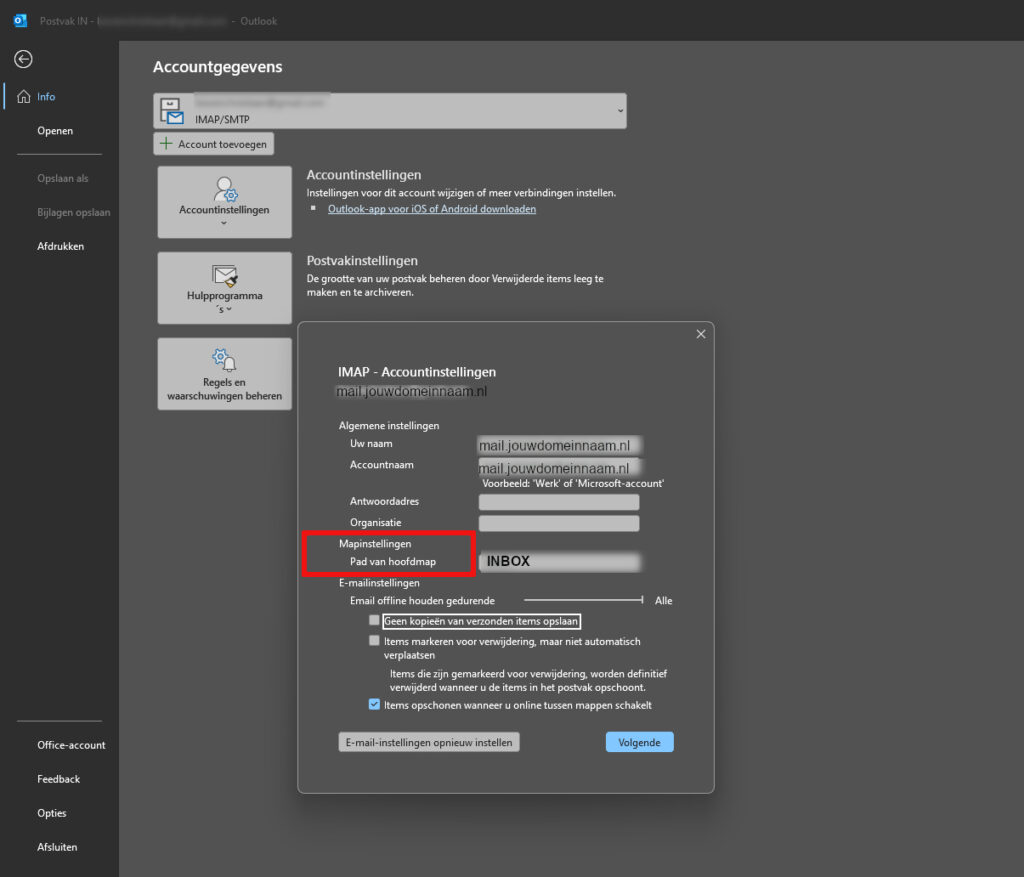
Enter the Path of the root folder:
Find the field or option for 'Path of root folder' or a similar setting.
In this field, enter INBOX, capitalised. This is the name of the root folder you want to set up.
Save the Setting:
Click the 'Next' button to save your setting and continue configuring your account.
Step 9: Done!
Complete the Configuration:
After you have entered all the settings, click the 'Done' or 'Finish' button. This confirms that you have finished configuring your account settings.
Check your Inbox:
Go to your inbox. You should now see that all folders are at the same level as your inbox. This means the display of your email folders is set correctly according to your configuration.
